All about code tracking and management for example, Azure DevOPS branching and merging, Release management, Continuous integration (CI) and Continuous deployment (CD).
To manage work, we need to create folders inside Branches. The key folders that can be created inside Branches are;
Features
Releases
Users
The main branch has to be in the root of repository. All working branches can be branch out from man into above folders;
Click on three vertical dots on main branch and create a working branch, feature/shahzad. You will see a folder and branch inside Branches. Very simple.
Here is the reference to article that will walk you through tf.exe and Git working for enforcing permissions;
A short list to configure Proxmox VE to send alert using Gmail account;
#--------- Proxmox email configuration -------------

# Install authentication libraries
apt-get install libsasl2-modules

Configure app passwords on your Google account

https://myaccount.google.com/apppasswords

# Configure postfix
echo "smtp.gmail.com <youremail>@gmail.com:<app-password>"> /etc/postfix/sasl_passwd

# update permissions
chmod 600 /etc/postfix/sasl_passwd

# hash the file
postmap hash:/etc/postfix/sasl_passwd


# check to to be sure the db file was create
cat /etc/postfix/sasl_passwd.db

# edit postfix config
nano /etc/postfix/main.cf

# google mail configuration

relayhost = smtp.gmail.com:587
smtp_use_tls = yes
smtp_sasl_auth_enable = yes
smtp_sasl_security_options =
smtp_sasl_password_maps = hash:/etc/postfix/sasl_passwd
smtp_tls_CAfile = /etc/ssl/certs/Entrust_Root_Certification_Authority.pem
smtp_tls_session_cache_database = btree:/var/lib/postfix/smtp_tls_session_cache
smtp_tls_session_cache_timeout = 3600s

# reload postfix
postfix reload

# send a test emails
echo "This is a test message sent from postfix on my Proxmox Server" | mail -s "Test Email from Proxmox" <your-email>@gmail.com
date | mail -s “test” <your-email>@gmail.com

# Now, fix from name in email

# install dependency
apt update
apt install postfix-pcre

# edit config
nano /etc/postfix/smtp_header_checks

# add the following text
/^From:.*/ REPLACE From: pvetower-alert pvetower-alert@<your-email>.com

# hash the file
postmap hash:/etc/postfix/smtp_header_checks

# check the contents of the file
cat /etc/postfix/smtp_header_checks.db

# add the module to our postfix config
nano /etc/postfix/main.cf

# add to the end of the file
smtp_header_checks = pcre:/etc/postfix/smtp_header_checks

# reload postfix service
postfix reload


# send a test emails
date | mail -s “test” <your-email>@gmail.com

--done

References

# steps reference list;
https://docs.technotim.live/posts/proxmox-alerts/
https://forum.proxmox.com/threads/proxmox-setup-for-gmail.13405/
Edge computing, the idea of having cloud-native resources at the edge of a network, is an emerging concept in IT, and it’s having an impact at fast food restaurant chain Chick-fil-A. The restaurant chain is also making use of the open-source Kubernetes container orchestration system and the concept of GitOps to help manage its edge deployments with a DevOps approach.
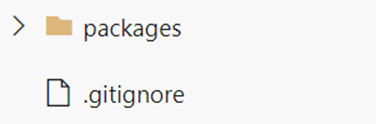
There are so many different reasons of getting this generic error. My particular use case is impacted by gitignore file. The project is configured to use package configuration and the lib (dll) were ignored in gitignore file.
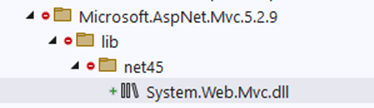
I had a working solution on my local. I commited this solution to ADO main. I went to ADO and created a working branch from main branch. I open working branch and started getting these yellow triangles.
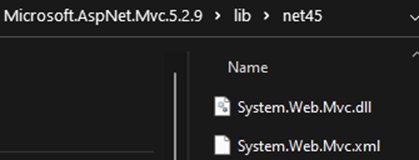
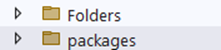
I decided to use MVC package as a test case. These are working solution lib files;
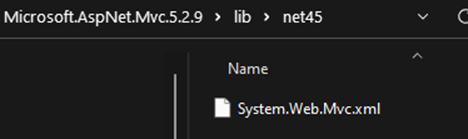
These are not working solution lib files (branch created from main).
You can see “System.Web.Mvc.dll” is missing in second picture.
How did I fix it?
The simplest way is to go to main branch in ADO and delete packages folder;
Clone the repository locally
Make the changes to the local version
Commit the changes locally
Push the changes back up to the GitHub repository
Goto each file and select Git and Add;
The folder will be back in the view;
Make sure to comment this line in gitignore file;
# NuGet Packages
# *.nupkg
# The packages folder can be ignored because of Package Restore
# SHAHZAD - Don't uncomment this line
# **/packages/*
# except build/, which is used as an MSBuild target.
# !**/packages/build/
# Uncomment if necessary however generally it will be regenerated when needed
#!**/packages/repositories.config
# NuGet v3's project.json files produces more ignoreable files
# *.nuget.props
# *.nuget.targets