Windows security settings

Instructions to setup screen saver and strengthen the password;

Screensaver Settings

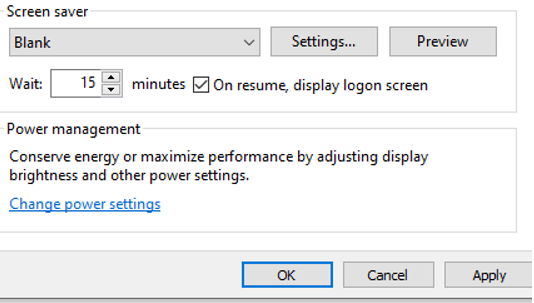
  1. Open your start menu and search for Change Screen Saver
  • Set the screen saver to blank, set the time to 15, and tick the box next to On resume, display login screen. Apply the settings. Your computer will now lock the screen after 15 minutes of inactivity.

Password Settings

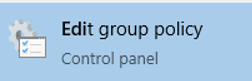
  1. Open your start menu and search for Edit group policy.
  • In the left pane navigate to Computer Configuration/Windows Settings/Security Settings/Account Policies/Password Policy
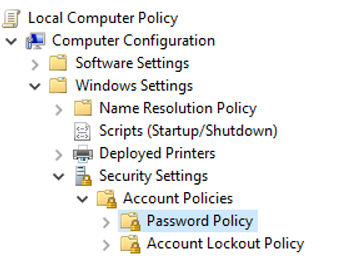
  • Double click on each policy listed below to open the menu. Change the policy to match what is listed below. Apply the change and close the window.
    • Enforce password history: 12 passwords remembered
    • Maximum password age: 90 days
    • Minimum password age: 1 day
    • Minimum password length: 12 characters
    • Password must meet complexity requirements: Enabled
  • Open a file explorer window. Right-click on This PC and choose Manage
  • In the left pane, navigate to System Tools/Local Users and Groups/Users
  • Find your account in the list of users. Double click your account to open the settings menu
  • In the list of settings, make sure Password never expires is NOT checked. If it is, remove the check and Apply the changes.
  • Hit CTRL+ALT+DEL to bring up the system menu. Choose Change a password to change your password to a new one that meets the requirements.

Change Windows 10 DNS settings using Command Prompt

Use Command Prompt to change the DNS settings on Windows 10.

  1. Open Start.
  2. Search for Command Prompt, right-click the top result, and select the Run as administrator option.
  3. Type the following command to launch the tool to change the networking settings and press Enter:netsh
  4. Type the following command to identify the names of the network adapters and press Enter:interface show interface
  5. Type the following command to set the primary DNS IP address and press Enter:interface ip set dns name="ADAPTER-NAME" source="static" address="X.X.X.X"In the command, remember to change ADAPTER-NAME with the name of your network adapter you identified on step No. 4, and change X.X.X.X with the IP address of the DNS server that you want to use.If you want to use Cloudflare, Google Public DNS, or Cisco OpenDNS, you can use these settings:
    • Cloudflare: 1.1.1.1 and 1.0.0.1
    • Google Public DNS: 8.8.8.8 and 8.8.4.4
    • OpenDNS: 208.67.222.222 and 208.67.220.220For example, this command sets the primary DNS addres to 1.1.1.1:interface ip set dns name="Ethernet1" source="static" address="1.1.1.1"

Type the following command to add an alternative DNS IP address and press Enter:

interface ip add dns name="ADAPTER-NAME" addr="X.X.X.X" index=2

In the command, remember to change ADAPTER-NAME with the name of your network adapter you queried on step No. 4, and change X.X.X.X with the secondary address that you want to use.

For example, this command sets the secondary DNS addres to 1.0.0.1:

interface ip add dns name="Ethernet1" addr="1.0.0.1" index=2

Quick tip: If you need to add even more DNS addresses, you can repeat the above steps, but increase the number of the index option by 1. For instance, interface ip add dns name="Ethernet1" addr="8.8.8.8" index=3

Once you complete the steps, Windows 10 will start using the new DNS server addresses to resolve domain names to numeric addresses that your device can understand.

You’ll need a new app to open this microsoft-edge – server 2019 – Microsoft Community

You’ll need a new app to open this microsoft-edge – server 2019 – Microsoft Community Wasted a lot of time on this. Fresh install all patches applied and opened IE and was asked to update to Edge, Download> accept, continue install> accept and then  “You’ll need a new app ……” Most of the posts I found show a resolution approach with a premise that edge is installed. I don’t know why but Edge is not installed in my case and trying sites with a link to install fail is a similar fashion. To resolve I needed to download from

https://www.microsoft.com/en-us/edge/business/download 

and complete the install.

Window server core configuraiton

Windows Core is mostly PowerShell and command driven. Here are some key questions and answers to get you started with this flavor.

Is there any way I can tell windows to automatically try to find drivers for all devices (of course after I establish network connection) so I don’t have to click on each device?

Try configuring windows (with the help of sconfig.cmd) to search windows updates for device drivers. Check the following links

https://docs.microsoft.com/en-us/windows-server/get-started/sconfig-on-ws2016

https://technet.microsoft.com/en-us/library/cc753091(v=ws.11).aspx

How can I Install drivers manually on core?

You can manually install drivers on Windows Server core with Pnputil. Check the following link,

Installing Drivers on Windows Server Core

Is there a way to use device manager from remote server?

Yes, you can use access the device manager of your core server from other computers MMC snap-in. Check the following link (section 1.3)
https://technet.microsoft.com/en-us/library/jj574205(v=ws.11).aspx