By default, SQL Server services run under these accounts;
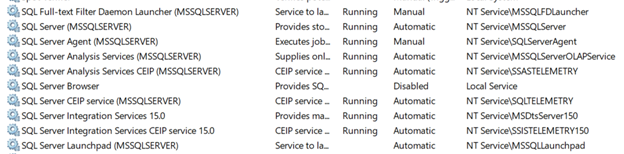
Sometimes administrator might have changed these service accounts to window accounts for management reasons. To get them back to default accounts, right click on service and change them to NT Service\[Account Name] where [Account Name] is above listed account without any password. Windows know how to setup the password.
We would like to create a windows proxy account so that we can use it inside SQL server. The intent is to use this account to read/write from windows file system.
I am using my local laptop for this demo but you can use a domain account. The only difference would be to change [ComputerName]\[AccountName] to [DomainName[\[AccountName].
- You might have received this user from your domain administrator. If not then create a Windows user “SQLService” on your local computer and make him member of “Users” group only.
- Next Open SIMS -> Security -> Login -> New Login.
Server Role -> public.
User Mapping -> msdb -> db_ssisoperator, public
User Mapping -> SSISDB -> ssis admin, public
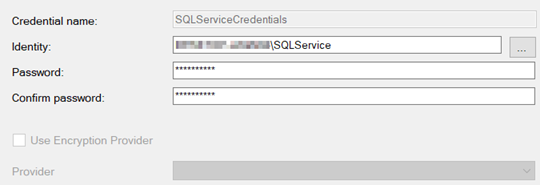
- Next Security -> Credentials -> New Credentials
Next SQL Server Agent -> Proxies -> SSIS Package Execution -> New Proxy
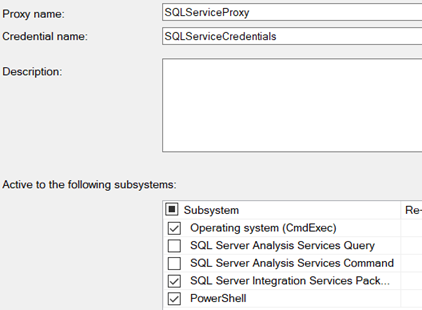
I have selected “Operating system (CmdExec) and “PowerShell” additional subsystems. You might not need these.
Under Principals, Select your windows service account;
Deploy your integration service packages. You will be able to see them under SSISDB->[Folder Name]\[Project Name]. Run your package. It will successeded because you are running them under your security context;

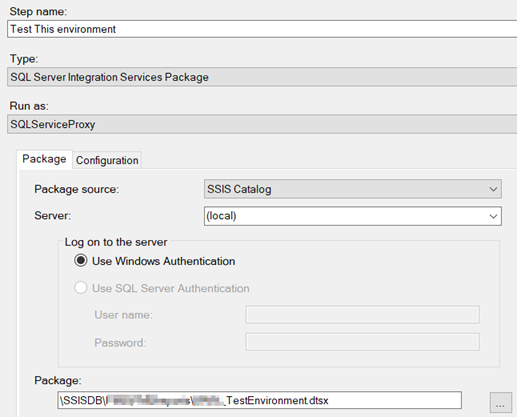
Create a job with a job step in SQL Server Agent. Make sure to change the context “Run as: SQLServiceProxy”;
When you run the job, it will fail. The reason, its running under the context of SQLService account. Connections within integration services are made with integrated security not SQL server.

Since we will be using SQL Login so I am going to change SSIS connection string in environment variables.
Now when you run the package, it will succeed.
Its time to check file system access. Open c:\windows\temp folder and see effective permission of SQLService account;
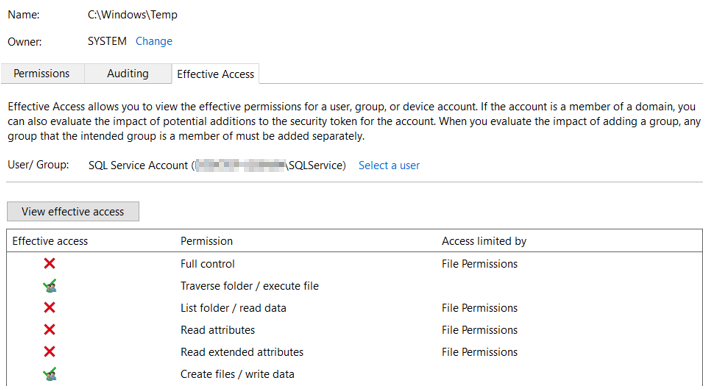
Grant full permission on this folder;
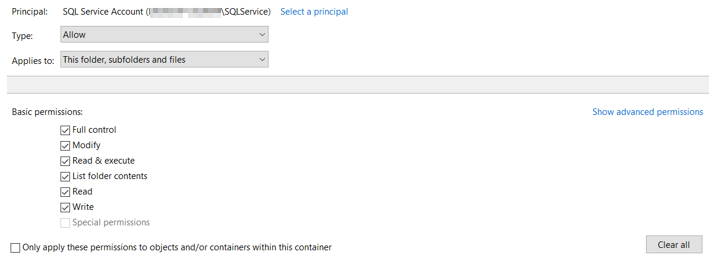
Script tasks require access to this folder for .NET framework and other temporary operations.
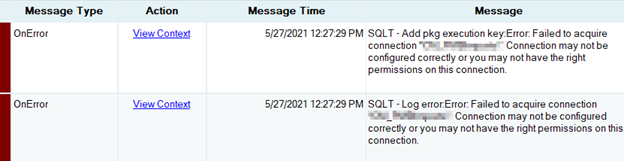
Still if you get this error;

The cause, SQLService windows account is not part of “Distributed COM Users” group on the machine where SSIS is installed. Add SQLService account to this windows group. You can read more about this here;
If the package fails again on server and you see this error in windows event viewer;

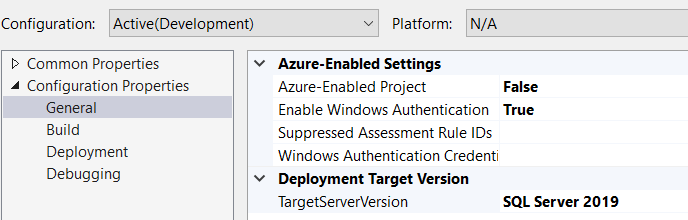
Make sure your SSIS project is targeting correct SQL Server Version. Right Click on your SSIS project -> Properties;
Deploy your project.
For SQL Server 2019 you need to set “False” for Azure-Enabled Project. As of this writing Azure-Enabled Project works with SQL Server 2017 only.
Run the package and everything should be Green now (hopefully :). We are done.
The above setup will work if we are reading/writing files in a domain controller environment or on a single server.
Setting up Azure Storage for reading/writing files
Service accounts are normally not interactive accounts. If we are using Azure Storage for reading/writing files with SAS then we would need to save Azure credentials in Credential Manager. To get to Credential Manager we need to login on server with our service account that will make it interactive.
Follow these steps;
Login to server with [servername]\SQLService account. If you are doing RDP, make sure this account is member of “Remote Desktop users” user’s group. Search for credential manager.
Add these credentials to credential manager;
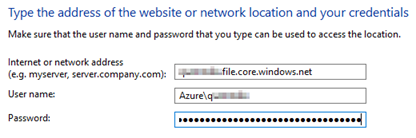
Make sure you can navigate to network share by doing \\[AzureStorageAccount.file.core.windows.net\ShareName
Remove this account from “Remote Desktop users”. Run agent, still fails.
Try to Run SQL Server Agent under windows service account;
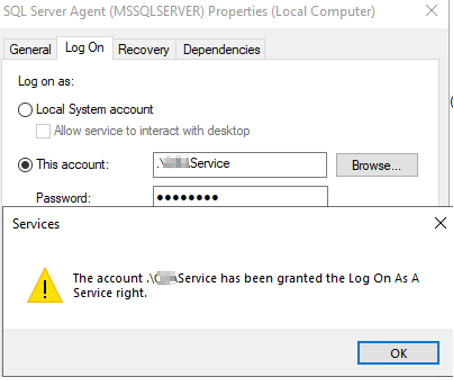
This time this started working. This is an alternative approach. We are using service account to run SQL Server agent. If this is the case then we don’t need to setup credentials and proxy accounts in SQL Server.
What happened behind the scene. Windows service account is granted “Log on as service permission” by windows. We can verify this following “Enable service log on through a local group policy” section below.
If we want to revert to “NT Service\SqlServerAgent” as service account, simply change your service account from windows service to SqlServerAgent and it would still work.
Follow this to allow an account “Login as service” permission manually if required;
Enable service log on through a local group policy
Follow these steps:
- Sign in with administrator privileges to the computer from which you want to provide Log on as Service permission to accounts.
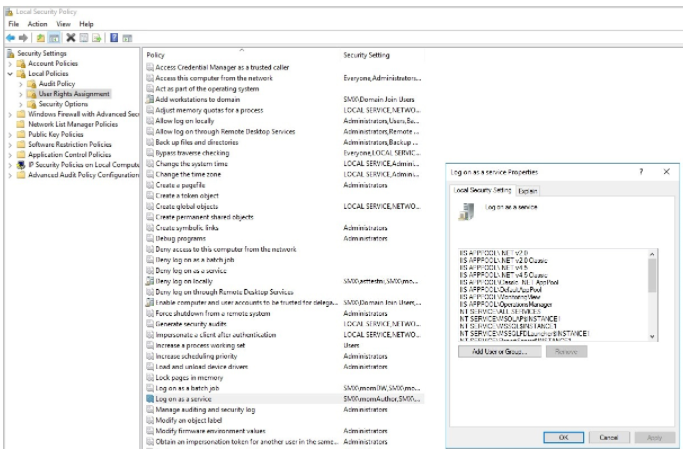
- Go to Administrative Tools, click Local Security Policy.
- Expand Local Policy, click User Rights Assignment. In the right pane, right-click Log on as a service and select Properties.
- Click Add User or Group option to add the new user.
- In the Select Users or Groups dialogue, find the user you wish to add and click OK.
- Click OK in the Log on as a service Properties to save the changes.
Resources;
https://docs.microsoft.com/en-us/system-center/scsm/enable-service-log-on-sm?view=sc-sm-2019

 Add to favorites