All about code tracking and management for example, Azure DevOPS branching and merging, Release management, Continuous integration (CI) and Continuous deployment (CD).
This article is for the basic process template. The hierarchy is Epic, Issue and Task. Each level in this hierarchy has a page. Keep in mind that page follows a 3 section layout, Detail, Planning and Related work.
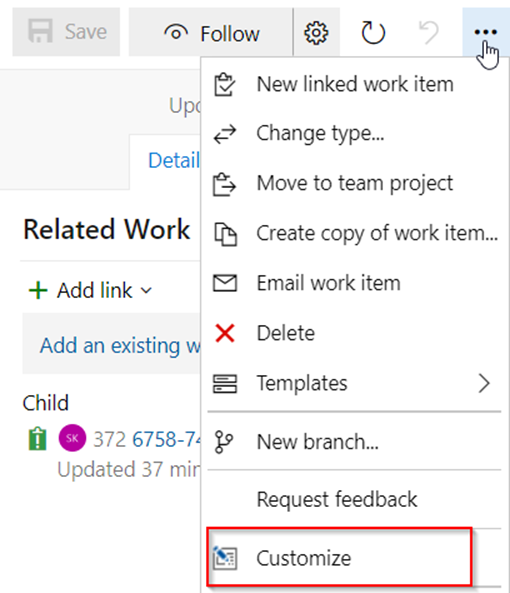
Epic customization Click on three dots (…) on the right side in Epic.
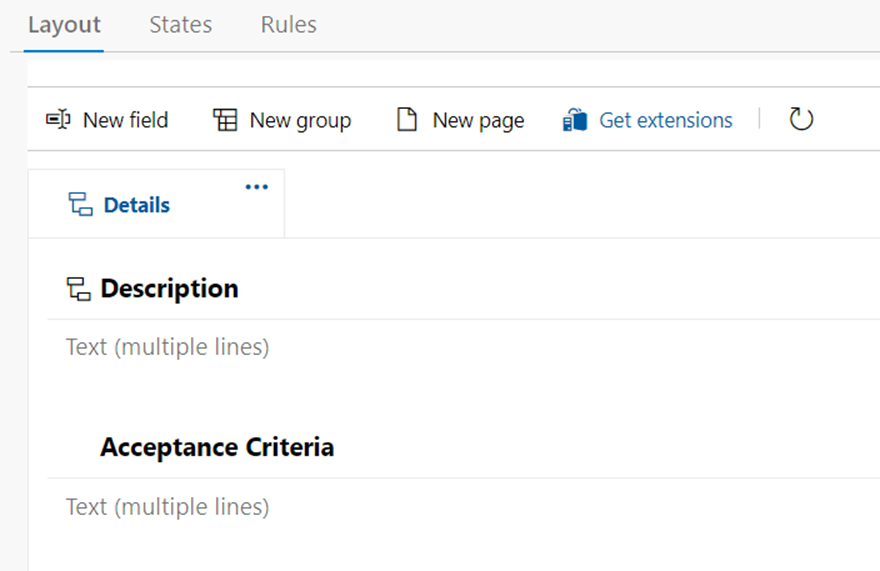
This will show following page;
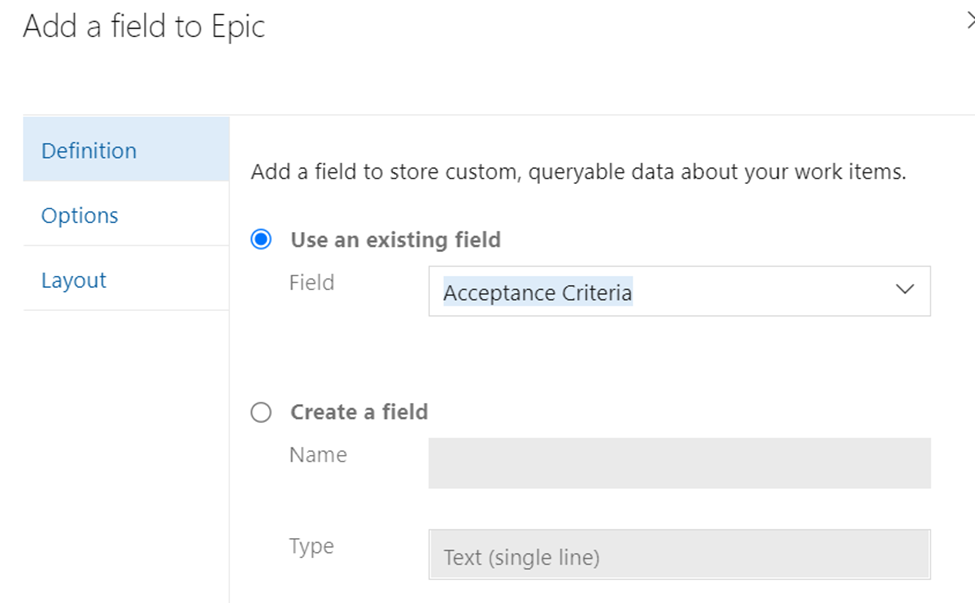
Click on New field. You will get to following page;
The frequently used fields are already listed in “Use an existing field” but if you want to create a new one, you can use “Create a field”. More important, on the left side of navigation, pay attention to Layout section. This is where you can decide where to store this field; left, center or right.
Some standard fields that can be used in these pages are;
Risk, Effort, Business Value, Start Date, Target Date, T-shirt sizing, Story points, Activity, Original Estimate, Remaining Work, Completed Work.
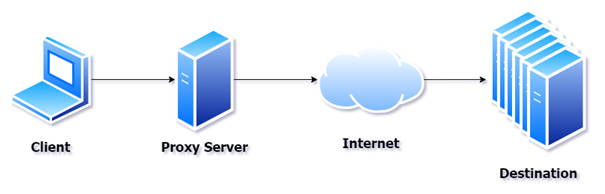
If you’re like me, the word “proxy” is an overloaded term. In different contexts, the word proxy means something different to different people. In this case, I’m talking about a server that’s an intermediary between the caller and the receiver of a networking call (usually HTTP or similar). Before you can understand a reverse proxy, let’s talk about forward proxies (or proxy servers, as you might be familiar with).
A proxy server is a server that takes requests and re-executes the call to the Internet (or intranet) on behalf of the original caller. This can be used for caching requests to improve speed of execution or for filtering content (as well as other reasons). In Figure 1, you can see a typical proxy server diagram.
Proxy server
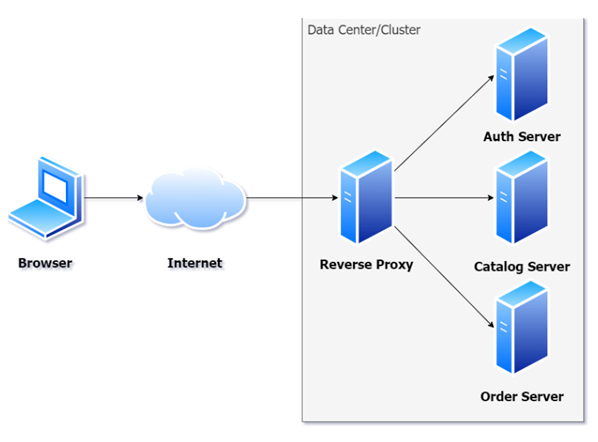
A reverse proxy is very much like a proxy server, but, not too surprisingly, in reverse. Instead of intercepting calls going outside the Internet/intranet, a reverse proxy intercepts calls from the outside and forwards them to local servers. Often the proxy server is the only accessible server in this scenario. If you look at Figure 2, you can see that all calls come into the reverse proxy. Often the caller has no idea that there’s a reverse proxy.
Reverse proxy
Now that you have a general idea of what a reverse proxy is, let’s talk about the why of reverse proxies.
Do I Need a Reverse Proxy?
Many projects have no need for a reverse proxy. You should learn about them anyway, because it’s another arrow in your development quiver to use when you need it. The use-case for using a reverse proxy is fairly well defined. The reverse proxy can be used in microservice scenarios where you don’t want individual clients to know about the naming or topology of your data center.
Reverse proxies are not only helpful in those microservices projects. Here are some other reasons to use a reverse proxy:
Service gatekeeping
Load balancing
SSL termination
Security
URL writing
Although you might want to use a reverse proxy for all of these reasons, you don’t need all of these services. Use a reverse proxy in the way your application works. You can use reverse proxies as a product (e.g., CloudFlare) or built into your own projects.
The most obvious use-case for many of you reading this article is to use a reverse proxy to provide an API gateway for microservices. A reverse proxy can expose a server that represents a single surface area for requests. The details of how the service is implemented and where the actual service resides are made opaque to the actual clients. This is what I call service aggregation. In this case, a reverse proxy is used to accept calls from clients and then pass them off to the underlying service (or cluster of services). This allows you to change the composition of the microservice without breaking clients.
Switch to some other branch and delete Test_Branch, as follows:
$ git checkout master
$ git branch -d Test_Branch
If above command gives you error – The branch 'Test_Branch' is not fully merged. If you are sure you want to delete it and still you want to delete it, then you can force delete it using -D instead of -d, as:
$ git branch -D Test_Branch
To delete Test_Branch from remote as well, execute:
A standard practice to create repository should always be;
Main branch should always have a .gitignore and readme file.
Create a working branch from main
Develop feature in your working branch
Before committing, do a merge from remote main to working branch and resolve any conflicts in working branch. This will help you to get team changes merged into your working branch.
Commit your changes. Create a PR and you are done.