LINQ behavior is that LINQ wouldn’t return null when results are empty rather it will return an empty enumerable. We can check this with .Any() method;
if (!YourResult.Any())
This is a LinqPad example;
var lst = new List<int>() { 1, 2, 3 };
var ans = lst.Where( i => i > 3 );

(ans == null).Dump();  // False
(ans.Count() == 0 ).Dump();  // True
Let’s go through another example where I have this string array to search; {“dog”,”cat”};
in this string; “This is a string and may or may not contain a word we are looking for like cat”
string input = "This is a string and may or may not contain a word we are looking for like cat";
List<string> search = new List<string>() { "dog", "cat"};
bool found = input.Split(' ').Any(x => search.Contains(x));
It works like this: the string gets split into an array of words. Then Any checks whether there is an x in this array where search.Contains(x).
var fontAwesomeIcon = "<span class=\"fa fa-redo\" style=\"font-size:30px; color: red; margin-bottom: 20px; \"> Try again</span>";
TempData["message"] = $"{fontAwesomeIcon} <h5>Something went wrong. Please try again. If problem persist, reach out to your point of contact for additional information</h5>";
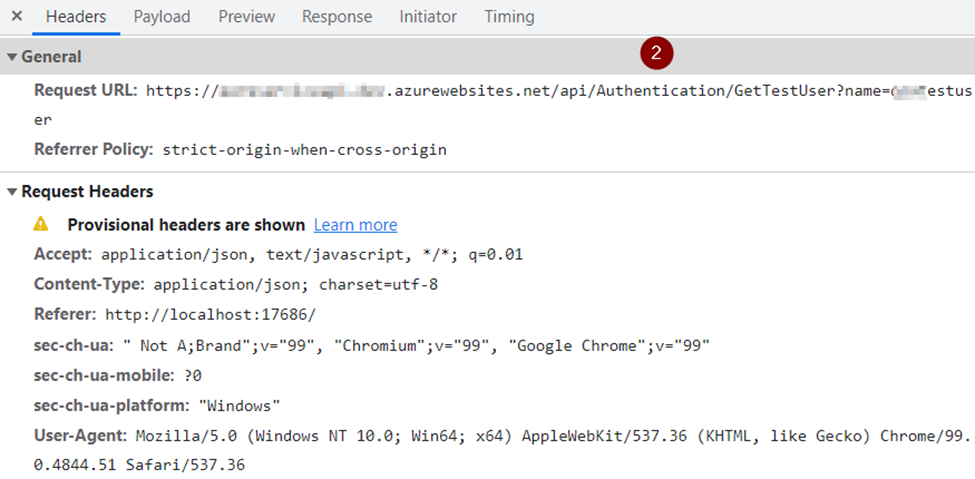
I did a Web API deployment in Azure Web API service. I was able to access the URL in browser and Postman. I started getting following error when I try to integrate in ASP.NET Web App in my local development environment;
Access to XMLHttpRequest at ‘https://xyz-dev.azurewebsites.net/api/Authentication/GetTestUser?name=testuser’ from origin ‘http://localhost:17686’ has been blocked by CORS policy: Response to preflight request doesn’t pass access control check: No ‘Access-Control-Allow-Origin’ header is present on the requested resource.
jquery.js:9172 GET https://xyz-dev.azurewebsites.net/api/Authentication/GetTestUser?name=testuser net::ERR_FAILED
To solve the problem, I did this;
Here is server-side (Web API) code;
Add following to Web API ConfigureServices method;
If interested in learning more about this, read below;
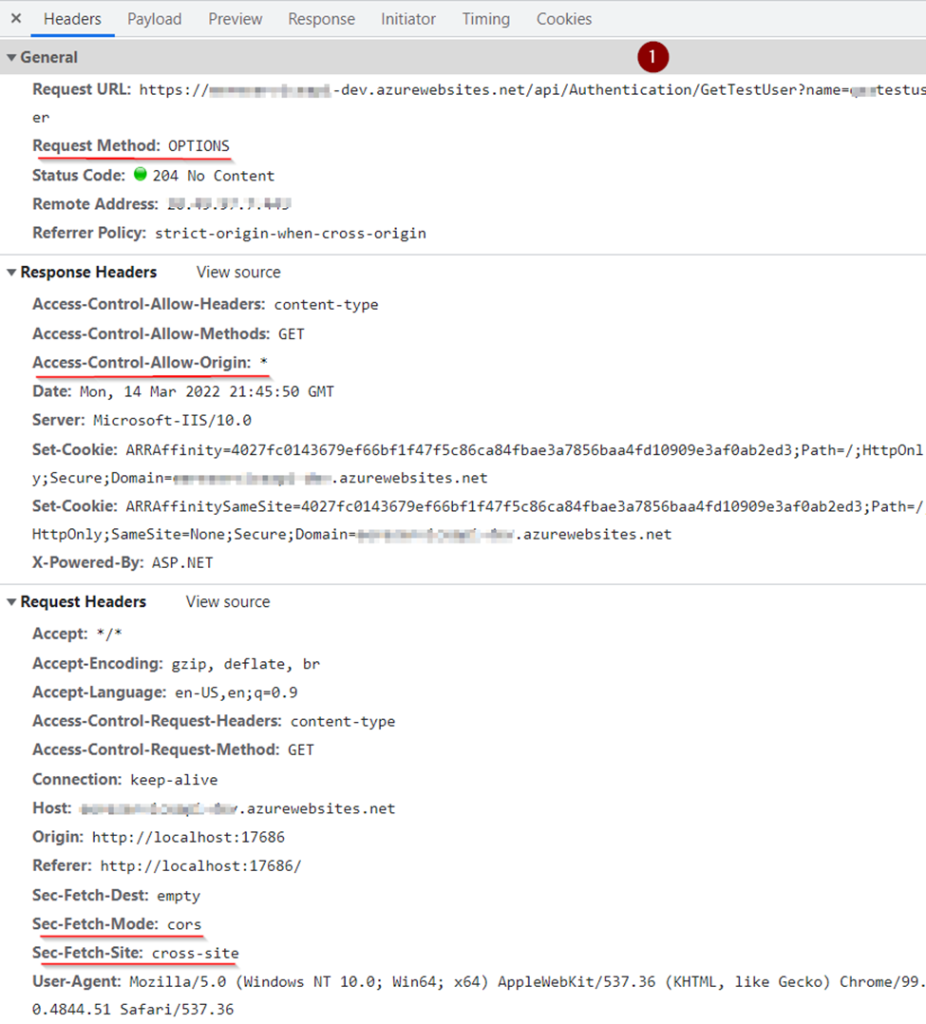
Researched and figured out that browser sends two requests to the server. Tiny request and actual request.
The browser sends a tiny request called a preflight request before the actual request. It includes details such as the HTTP method used and whether any custom HTTP headers are present. The preflight allows the server to see how the actual request would appear before it is sent. The server will then tell the browser whether or not to submit the request, or whether to return an error to the client instead.
See below for problem header without CORS and with CORS in web API;
Headers without CORS implementation in Web API (Problem);
Headers with CORS implementation in Web API (Problem solved);