I would like to get data out of Object variable in Script task or Script component. My object variable name is VersionList;

If we have used OLE DB to load data into Object variable, we need to use this;
// Set up the DataAdapter to extract the data, and the DataTable object to capture those results. This will write the contents of the Recordset to a new DataTable object.
// Create the connector
OleDbDataAdapter da = new OleDbDataAdapter();

// Create the output DataTable
DataTable dt = new DataTable();

// Load the DataTable
da.Fill(dt, Dts.Variables["VersionList"].Value);

// Now, replace the value in the VersionList variable. This SSIS variable will now contain a DataTable object filled with the results extracted from the ADO Recordset

Dts.Variables["VersionList"].Value = dt;
If we have used ADO.NET to load data into Object, then we need to use this;
 try
            {
                var ds = Dts.Variables["User::VersionList"].Value as DataSet;
                DataTable dt = new DataTable();
                // Create the output DataTable
                dt.TableName = "VersionList";
                // Now, replace the value in the VersionList object variable. This SSIS variable will now contain a DataTable object filled with the results extracted from the ADO Recordset
                dt = ds.Tables[0];
                Dts.Variables["User::VersionList"].Value = dt;

                Dts.TaskResult = (int)ScriptResults.Success;

            }
            catch (Exception ex)
            {
                var message = $"Error comparing version numbers. ERR: {ex.Message.ToString()}";
                //MessageBox.Show(message);
                Dts.Events.FireError(1, ex.TargetSite.ToString(), message, "", 0);
                Dts.TaskResult = (int)ScriptResults.Failure;
            }
We can use it in script component like this;
//get version and rules from VersionList variable
DataTable dt = (DataTable)Variables.VersionList;
//iterate over rows
foreach (DataRow row in dt.Rows)
{
   string message = $@"Details: {row["VersionNumber"].ToString()} - {row["VersionCode"].ToString()}
                           - {row["TabName"].ToString()} - {row["CellRangeCode"].ToString()}
                            - {row["CellRange"].ToString()}";
   MessageBox.Show(message);
}
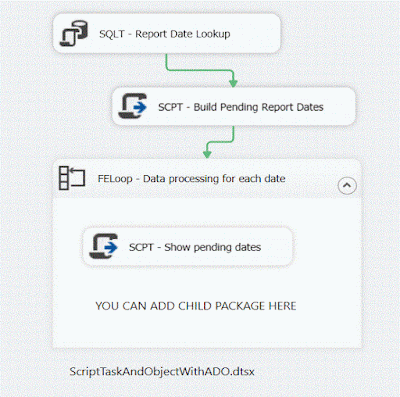
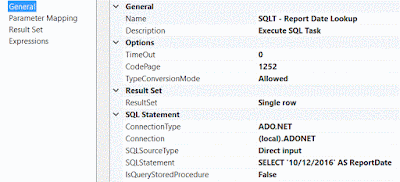
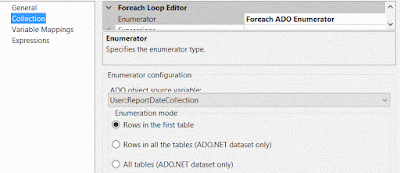
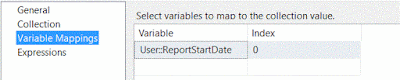
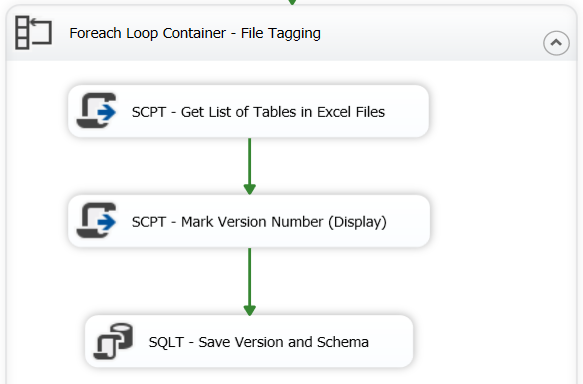
If for some reasons we are using Foreach loop and keep referring to same record set, then best design is to keep it ouside Foreach loop. An example is this;
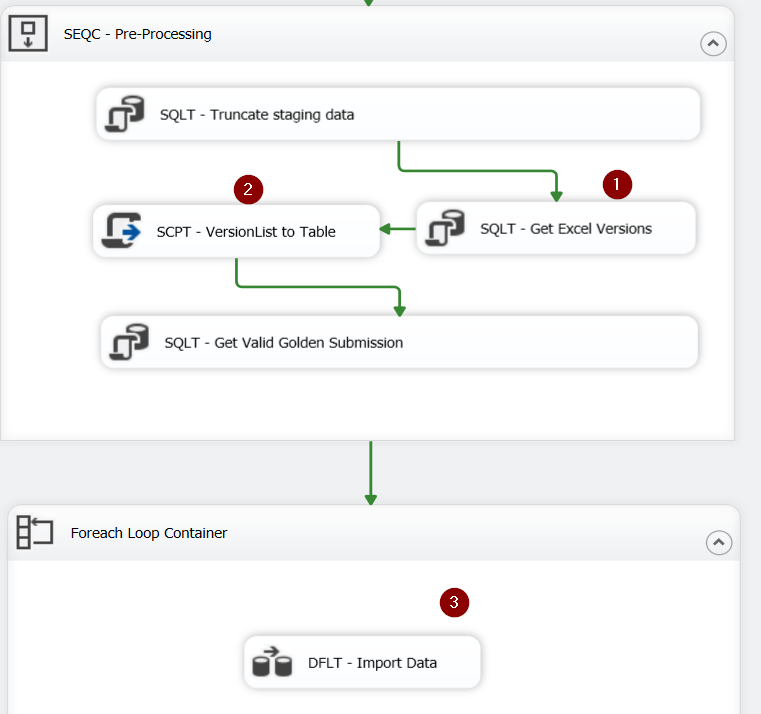
We are getting VersionList from (1). We convert it to a data table in (2). We use it inside data flow task (3) of Foreach loop container.