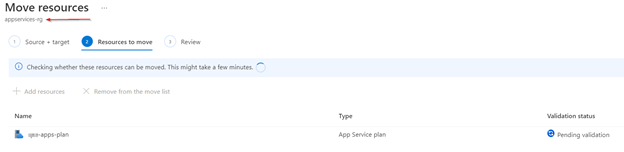
I have created a resource group in East US2. I am going to move “app service plan” from “East US” to “East US2.
Great. The resource is moving.
The resource can be moved but its location (region) is retained.
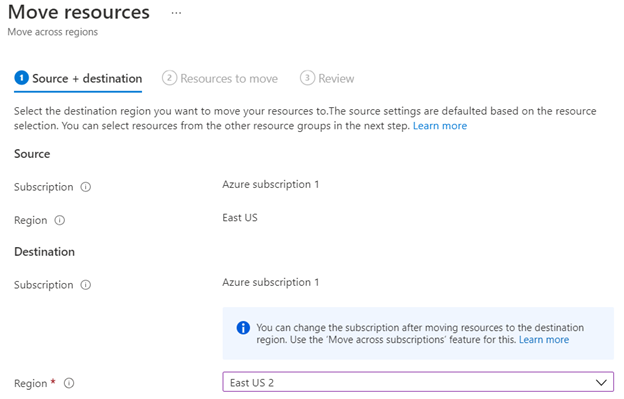
This time I am going to move same resource from East US to East US2 (Region transfer).
If you click ok, you will see this message;
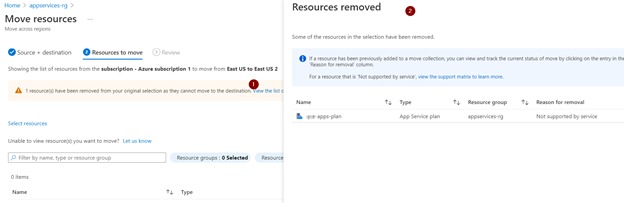
No use. One region resource cannot be moved to another region with Move option. What it means, that you have to create your resource group, app service plan, apps domain name, application insights in a separate region.
Follow this article from Microsoft to move your resources from one region to another.
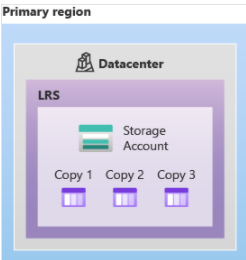
Locally redundant storage (LRS) replicates your data three times within a single data center in the primary region. LRS provides at least 99.999999999% (11 nines) durability of objects over a given year.
The following diagram shows how your data is replicated within a single data center with LRS:
LRS is the lowest-cost redundancy option and offers the least durability. If a disaster such as fir or flooding occurs with the data center, all replicas of a storage account may be lost or unrecoverable.
Zero-redundant storage
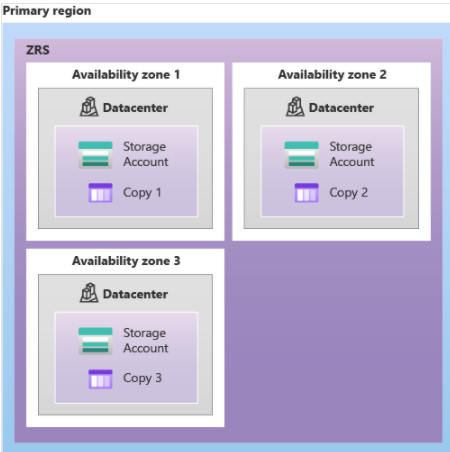
Zone-redundant storage (ZRS) replicates your Azure Storage data synchronously across three Azure availability zones in the primary region. Each availability zone is a separate physical location with independent power, cooling, and networking. ZRS offers durability for Azure Storage data objects of at least 99.9999999999% (12 9’s) over a given year.
The following diagram shows how your data is replicated across availability zones in the primary region with ZRS:
Microsoft recommends using ZRS in the primary region for scenarios that require consistency, durability, and high availability.
If your application is restricted to replicating data only within a country or region due to data governance requirements, you may opt for LRS or ZRS. The reason, In some cases, the paired regions across which the data is geo-replicated may be in another country or region.
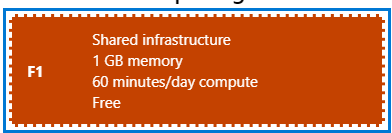
Free plan are good if you don’t care about backup, auto-scaling, staging slots and storage.
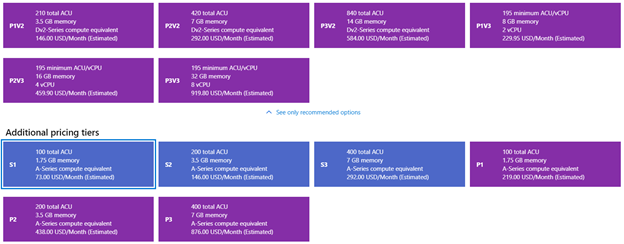
As of this writing, these are Azure App service plan;
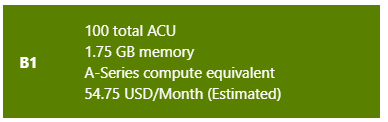
For less demanding workloads (Dev / Test)
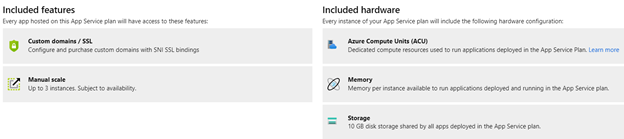
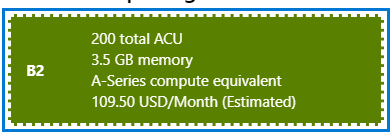
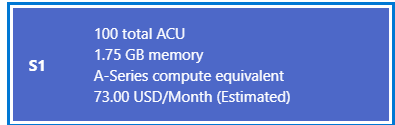
For most production workloads (Production)
Other production tier options are here;
To scale up/down, go to Azure web application and select Scale up (App Service plan). The selected pricing tier will have a blue border around it. Change the lower pricing tier based on your requirements.
Once you have reached to a point where you will need more than 1GB of storage and RAM, then I think S1 production plan might be your starting point. This offers 10GB of storage, and all benefits that free tier does not provide.