ERR: External table is not in the expected format;
The error might be the result of wrong extended properties in connection string. Check code examples below;
Following code will help you to open *.xls files;
string connString = string.Format("Provider = Microsoft.ACE.OLEDB.12.0; Data Source ={0}; Extended Properties = 'EXCEL 8.0 XML;HDR=YES;IMEX=1'", fullPathToExcel);
using (OleDbConnection conn = new OleDbConnection(connString))
{
   conn.Open();
  //...any other instruction
}
Following code will help you to open *.xlsx files;
string connString = string.Format("Provider = Microsoft.ACE.OLEDB.12.0; Data Source ={0}; Extended Properties = 'EXCEL 12.0 XML;HDR=YES;IMEX=1'", fullPathToExcel);
using (OleDbConnection conn = new OleDbConnection(connString))
{
   conn.Open();
  //...any other instruction
}
Excel ADO.NET properties for different excel version are;
Excel 97-2003 Workbook (.XLS) –> “Excel 80”
Excel 2007-2010 Workbook (.XLSX) –> “Excel 12.0 XML”
Excel 2007-2010 Macro-enabled Workbook (.XLSM) –> “Excel 12.0 MACRO”
This is how you can run a select query;
"SELECT * FROM [StoreSheet$A13:I]"If you are not able to solve External table is not in the expected format error, consider changing driver. try NPOI or ExcelDataReader.
ExcelDataReader Library
This library doesn’t work with .NET core.
EPPlus Library
EPPlus library works with .NET core.
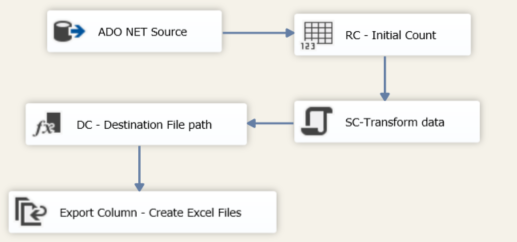
Working with Excel Files with the help of Script Task
Integration Services provides the Excel connection manager, Excel source, and Excel destination for working with data stored in spreadsheets in the Microsoft Excel file format. The techniques described in this topic use the Script task to obtain information about available Excel databases (workbook files) and tables (worksheets and named ranges).
You can read more here.
How to unprotect the Excel sheet
Common variables and Namespaces used to read Excel files
Variables. Open the Variables window and define the following variables:
1- ExcelFile, of type String. Enter the complete path and filename to an existing Excel workbook.
2 -ExcelTable, of type String. Enter the name of an existing worksheet or named range in the workbook
named in the value of the ExcelFile variable. This value is case-sensitive.
3 – ExcelFileExists, of type Boolean.
4 – ExcelTableExists, of type Boolean.
5 – ExcelFolder, of type String. Enter the complete path of a folder that contains at least one Excel workbook.
6 – ExcelFiles, of type Object.
7 – ExcelTables, of type Object.
Imports statements
You will need following .NET Framework namespaces;
1 – System.IO, for file system operations.
2- System.Data.OleDb, to open Excel files as data sources.
References.
The code that read schema information from Excel files require an additional reference in the script project to the System.Xml namespace.